JB Weld Plastic Bonder Instructions: A Comprehensive Guide
This guide details using JB Weld Plastic Bonder for durable plastic repairs, covering preparation, mixing, application, and curing for professional-grade fixes.
Learn to confidently tackle various plastic repair projects, from automotive parts to home improvements, with this step-by-step instructional resource.
Understanding JB Weld Plastic Bonder
JB Weld Plastic Bonder is a specialized, high-strength epoxy adhesive meticulously engineered for bonding a diverse range of plastic materials. Unlike standard adhesives that may struggle with the unique properties of plastics, this formula delivers a robust and lasting connection, making it ideal for repairs where structural integrity is paramount.
This adhesive isn’t a one-size-fits-all solution; it’s specifically designed to overcome the challenges associated with bonding plastics, which often have low surface energy and can be difficult to adhere to. It excels in applications where other adhesives fail, offering exceptional resistance to impact, vibration, and temperature fluctuations.
The product is commonly found in a convenient syringe format, facilitating precise application and minimizing waste. It’s a go-to choice for automotive repairs – think bumpers, dashboards, and interior trim – as well as household fixes, crafting projects, and various DIY endeavors. Understanding its specific formulation and intended use is key to achieving optimal results, ensuring a repair that stands the test of time.
Proper application, as detailed in the J-B Weld manuals, is crucial for maximizing the adhesive’s potential.
What is JB Weld Plastic Bonder?
JB Weld Plastic Bonder is a two-part epoxy adhesive specifically formulated for bonding various types of plastics, offering a significantly stronger and more durable repair than many conventional adhesives. It’s presented as a cold-weld product, meaning it doesn’t require external heat for curing, simplifying the repair process.
Available in a convenient syringe format (25ml is common), the product features a 1:1 mix ratio of resin to hardener, making accurate proportioning straightforward. This precise mixing is critical for achieving the adhesive’s full bonding potential. The syringe applicator allows for controlled dispensing, minimizing mess and waste.
Unlike general-purpose epoxies, Plastic Bonder is designed to address the unique challenges of adhering to plastic surfaces, which often have low surface energy. It creates a strong, lasting bond on both hard-to-bond plastics and those that are more easily adhered to. It’s a gap-filling adhesive, capable of bridging small imperfections and irregularities in the surfaces being joined.
This product is a popular choice for repairing broken plastic items, automotive parts, and various household objects, offering a reliable and long-lasting solution.
Types of Plastics it Bonds
JB Weld Plastic Bonder demonstrates excellent adhesion to a wide array of plastic materials, making it a versatile repair solution. It effectively bonds to polypropylene (PP), polyethylene (PE), ABS (Acrylonitrile Butadiene Styrene), PVC (Polyvinyl Chloride), and polycarbonate (PC) plastics – commonly found in automotive parts, household items, and various consumer products.
However, it’s important to note that adhesion can vary depending on the specific plastic type and surface preparation. While generally effective, some plastics with very low surface energy may require more thorough surface roughening for optimal bonding. The product also works well with fiberglass, metal, and even some rubbers, expanding its utility beyond purely plastic repairs.
It’s crucial to identify the plastic type before application, as compatibility impacts the strength and longevity of the bond. An infographic resource can assist in pinpointing the correct JB Weld product for specific materials, though it doesn’t cover every possibility.
For challenging plastics, a test patch is recommended to verify adhesion before committing to a full repair. Proper surface preparation, as detailed in subsequent sections, is paramount for successful bonding across all plastic types.
Key Features and Benefits
JB Weld Plastic Bonder distinguishes itself through its high strength and durability, offering a robust solution for repairing broken or damaged plastic components. Its specialized formulation creates a lasting bond capable of withstanding significant stress and impact, restoring items to their original functionality.
A key benefit is its ability to fill gaps, making it ideal for repairing fractured plastics where pieces don’t perfectly align. The adhesive’s gap-filling properties ensure a strong connection even with imperfect fits. It’s delivered in a convenient syringe for precise application, minimizing waste and mess.
Furthermore, Plastic Bonder is designed for both indoor and outdoor use, resisting moisture, chemicals, and temperature fluctuations. This makes it suitable for automotive repairs, marine applications, and general household fixes.
The product’s versatility extends to bonding dissimilar materials, like plastic to metal, broadening its application range. Its ease of use, combined with its professional-grade performance, makes it a popular choice for DIY enthusiasts and professionals alike.
Preparation for Bonding
Proper surface preparation is crucial for a strong, lasting bond. Cleaning, roughening, degreasing, and ensuring dryness are essential steps before applying JB Weld Plastic Bonder.
Surface Preparation: Cleaning
Thorough cleaning is the foundational step in achieving a robust and durable bond with JB Weld Plastic Bonder. Begin by removing any loose particles, dirt, dust, or contaminants from the surfaces you intend to join. This can be effectively accomplished using a mild detergent and warm water solution.
Scrub the plastic surfaces gently with a clean cloth or brush to dislodge any ingrained grime. Avoid abrasive cleaners or scouring pads, as these can scratch or damage the plastic, hindering the adhesive’s ability to properly adhere. After washing, rinse the surfaces thoroughly with clean water to eliminate any soap residue.
For stubborn contaminants like oil, grease, or mold release agents, a dedicated plastic cleaner or degreaser may be necessary. Always follow the manufacturer’s instructions when using these products, ensuring compatibility with the type of plastic you are working with. Pay close attention to intricate details or hard-to-reach areas, ensuring they are equally clean.
Finally, inspect the surfaces to confirm they are completely free of any visible contaminants. A clean surface provides the optimal foundation for the adhesive to bond effectively, maximizing the strength and longevity of the repair.
Surface Preparation: Roughening
Roughening the plastic surfaces is a critical step to enhance adhesion with JB Weld Plastic Bonder, particularly for smooth or glossy plastics. This process creates a mechanical key, providing the adhesive with more surface area to grip and bond effectively. Use 80-120 grit sandpaper to lightly abrade the surfaces.
Apply moderate pressure and use consistent, even strokes. Avoid excessive sanding, which could weaken the plastic or create deep scratches. The goal is to create a slightly textured surface, not to remove material entirely. Focus on the areas where the adhesive will be applied, ensuring adequate roughening for a strong bond.
For complex shapes or hard-to-reach areas, consider using a sanding sponge or a small rotary tool with a sanding attachment. Always wear appropriate safety gear, including a dust mask and eye protection, to prevent inhalation of plastic particles. After sanding, thoroughly remove any sanding dust with a clean cloth or compressed air.
Roughening significantly improves the bond strength, especially for plastics that are naturally resistant to adhesion. This step ensures a lasting and reliable repair, maximizing the performance of the JB Weld Plastic Bonder.
Ensuring a Dry Surface
Moisture is the enemy of a strong adhesive bond, and JB Weld Plastic Bonder is no exception. Before applying the adhesive, meticulously ensure that both surfaces to be bonded are completely dry. Even seemingly insignificant amounts of moisture can compromise the bond’s integrity and lead to premature failure.
If the plastic parts have been recently cleaned with water or a solvent, allow ample time for them to air dry thoroughly. You can accelerate the drying process using a clean, lint-free cloth or compressed air. For porous plastics, consider using a mild heat source (like a hairdryer on a low setting) to evaporate any trapped moisture.
Condensation can also be a concern, especially when working in humid environments. If condensation is present, wipe the surfaces dry and allow them to reach room temperature before proceeding. Verify dryness by observing the surfaces for any signs of dampness or fogging.
A dry surface is fundamental for optimal adhesion, ensuring the JB Weld Plastic Bonder forms a robust and durable connection between the plastic components.
Degreasing the Surfaces
Contaminants like oil, grease, mold release agents, and even fingerprints can severely hinder the bonding performance of JB Weld Plastic Bonder. These substances create a barrier preventing the adhesive from making direct contact with the plastic surface, resulting in a weak and unreliable bond.
Thorough degreasing is therefore a critical step in the preparation process. Use a dedicated degreasing agent specifically designed for plastics – isopropyl alcohol (IPA) is often an excellent choice. Apply the degreaser to a clean, lint-free cloth and gently wipe both surfaces to be bonded.
Avoid abrasive cleaners or solvents that could damage the plastic. Ensure the degreaser is fully evaporated before proceeding with the bonding process. Repeat the degreasing process if necessary, especially if the plastic parts were heavily contaminated.
Proper degreasing maximizes surface energy, allowing the JB Weld Plastic Bonder to wet the plastic effectively and establish a strong, lasting connection. A clean surface is paramount for achieving optimal bond strength and durability.
Mixing and Application
Achieving a strong bond relies on precise mixing and careful application of the JB Weld Plastic Bonder. A 1:1 ratio ensures proper curing, while even distribution maximizes contact.
The 1:1 Mixing Ratio
The cornerstone of a successful bond with JB Weld Plastic Bonder is adhering to the precise 1:1 mixing ratio. This means equal parts of the resin and hardener components must be combined. Deviating from this ratio will compromise the adhesive’s strength and curing properties, potentially leading to a weak or incomplete repair.
To ensure accuracy, it’s recommended to use a clean, flat surface and a mixing tool – such as a plastic or wooden stick – to thoroughly combine the two parts. Avoid using metal tools, as they can introduce contaminants that interfere with the curing process. Dispense equal amounts of resin and hardener onto the mixing surface, and then meticulously blend them together.
The goal is to achieve a homogenous mixture with a consistent color. Insufficient mixing will result in uncured areas within the bond, while overmixing doesn’t typically pose a significant issue. Take your time and ensure that no streaks or swirls of either component remain visible. A well-mixed batch will have a uniform appearance, indicating that the resin and hardener are fully integrated, ready for application and optimal performance.
Thorough Mixing Techniques
Achieving a truly homogenous mixture is paramount when working with JB Weld Plastic Bonder. Simply combining the resin and hardener isn’t enough; proper technique ensures optimal bonding strength and durability. Begin by placing equal amounts of each component onto a clean, disposable surface – a plastic palette or piece of cardboard works well.
Utilize a clean mixing stick, preferably plastic or wood, to gently fold the resin and hardener together. Avoid vigorous stirring, which can introduce air bubbles that weaken the bond. Instead, scrape the sides and bottom of the mixing surface, incorporating all of the material into the blend. Continue this folding motion for at least two to three minutes.
Visually inspect the mixture frequently. A properly mixed batch will exhibit a uniform color and consistency, free of streaks or swirls. If any unmixed material remains, continue the folding process until a homogenous blend is achieved. Remember, complete mixing is crucial for activating the adhesive’s full potential and guaranteeing a long-lasting, reliable repair.
Applying the Adhesive: Thin vs. Thick Layers
The optimal adhesive layer thickness depends on the specific repair and the gap between the surfaces. Generally, a thin, even layer is preferred for close-fitting parts, maximizing contact area and bond strength. Apply just enough adhesive to cover the surfaces, avoiding excessive buildup that can lead to squeeze-out and a messy finish.
For larger gaps or areas requiring increased structural support, a slightly thicker layer may be necessary. However, avoid applying excessively thick layers, as this can hinder proper curing and potentially weaken the bond. Building up the adhesive in multiple thin layers, allowing each to partially cure before applying the next, is often a better approach.
Ensure complete coverage of both surfaces to be bonded. Use an applicator tool, such as a syringe or small brush, to spread the adhesive evenly. Remove any excess adhesive promptly with a clean cloth or solvent, following the manufacturer’s recommendations. Consistent application is key to a durable and aesthetically pleasing repair.
Using Application Tools (Syringe, etc.)
JB Weld Plastic Bonder often comes in a syringe format, providing precise and controlled application, especially beneficial for intricate repairs or hard-to-reach areas. The syringe allows for direct dispensing of the mixed adhesive, minimizing waste and ensuring accurate placement.
Alternatively, small brushes, toothpicks, or plastic spreaders can be used for broader coverage or when a syringe isn’t ideal. These tools enable even distribution of the adhesive across larger surfaces. When using brushes, opt for disposable ones to avoid cleanup issues.
For gap-filling applications, consider using a backing material alongside the adhesive to provide support during curing. Clean the chosen tool thoroughly before and after use to prevent contamination. Proper tool selection and technique contribute significantly to a successful and professional-looking repair. Always refer to the product manual for specific recommendations regarding application tools.

Bonding Process & Curing
Achieving a strong bond requires proper clamping and support during the curing process. Initial set times vary, but full strength is reached after a complete cure, often 24 hours.
Optimal curing temperatures enhance bond strength, while post-cure finishing like sanding and painting can refine the repaired area’s appearance.
Clamping and Support During Curing
Clamping is absolutely crucial for a successful bond with JB Weld Plastic Bonder. Applying consistent pressure ensures the adhesive fills any gaps and maintains close contact between the surfaces throughout the curing process. Without adequate clamping, the epoxy can shift, resulting in a weak or incomplete bond. Consider the geometry of the parts being bonded when selecting clamping methods.
For flat surfaces, simple clamps or weights often suffice. However, more complex shapes may require custom supports or jigs to distribute pressure evenly. Ensure the clamping force isn’t excessive, as this could squeeze out too much adhesive, weakening the joint. Use protective materials between the clamps and the plastic to prevent marring or damage.
Support is equally important, especially for vertically oriented repairs. Gravity can cause the adhesive to sag or the parts to separate before the epoxy fully sets. Utilize props, tape, or additional clamping to maintain the correct alignment and prevent movement. The goal is to keep the bonded surfaces immobile during the entire curing timeframe. Remember, a stable and supported bond is a durable bond!
Check periodically during the initial curing phase to ensure the clamps remain secure and the support is adequate. Adjust as needed to maintain consistent pressure and alignment.
Cure Times: Initial vs. Full Strength
Understanding JB Weld Plastic Bonder’s cure times is vital for project success. The adhesive doesn’t reach its maximum strength immediately after mixing; it undergoes a curing process with distinct phases. Initial handling strength, typically achieved within 30-60 minutes, allows for the removal of clamps and gentle handling of the repaired item. However, this strength is significantly lower than the final, fully cured strength.
Full cure, where the adhesive reaches its maximum bonding potential, generally takes 24 hours at room temperature; This timeframe allows the epoxy molecules to fully cross-link, creating a robust and durable bond. Avoid subjecting the repaired item to significant stress or load during this period.
Factors like temperature can influence cure times. Lower temperatures will slow down the curing process, while higher temperatures (within recommended limits – see manufacturer’s instructions) can accelerate it. Patience is key; allowing the adhesive to fully cure ensures a long-lasting and reliable repair.
While initial strength provides temporary stability, waiting for full cure is crucial for applications requiring high structural integrity or resistance to stress.
Optimal Curing Temperature
Achieving the strongest possible bond with JB Weld Plastic Bonder relies heavily on maintaining the optimal curing temperature. While the adhesive will cure at room temperature (around 70-75°F or 21-24°C), slightly elevated temperatures can significantly accelerate the curing process and enhance the final bond strength.
The ideal curing temperature range is typically between 70°F and 80°F (21°C — 27°C). Maintaining this range ensures proper molecular cross-linking, leading to a more durable and resilient repair. Avoid exposing the adhesive to temperatures below 60°F (15°C), as this can drastically slow down the curing process and potentially compromise the bond’s integrity.
Gentle warming can be employed, but avoid direct heat sources like heat guns or ovens, as these can cause uneven curing or even damage the plastic. A warm room or a controlled-temperature environment is preferable.
Always consult the product packaging for specific temperature recommendations, as variations may exist between different JB Weld Plastic Bonder formulations. Proper temperature control is a simple yet crucial step towards a successful and long-lasting plastic repair.
Post-Cure Finishing (Sanding, Painting)
Once the JB Weld Plastic Bonder has fully cured, some post-cure finishing may be desired to achieve a seamless and aesthetically pleasing repair. This typically involves sanding and potentially painting the repaired area to match the surrounding surface. Allow ample curing time – typically 24-72 hours – before commencing any finishing work.
Sanding should be performed gradually, starting with a coarser grit sandpaper (e.g., 120-grit) to remove any excess adhesive and level the repair. Progress to finer grits (e.g., 220-grit, then 320-grit) to smooth the surface and prepare it for painting. Be cautious not to sand away the surrounding plastic material.
After sanding, thoroughly clean the area to remove any dust or debris. Priming the repaired area is recommended before painting, as it promotes better adhesion and a more uniform finish. Use a primer compatible with both the plastic and the chosen paint.
Apply several thin coats of paint, allowing each coat to dry completely before applying the next. This will result in a more durable and professional-looking finish. Ensure the paint is also compatible with the plastic type being repaired.

Safety Precautions
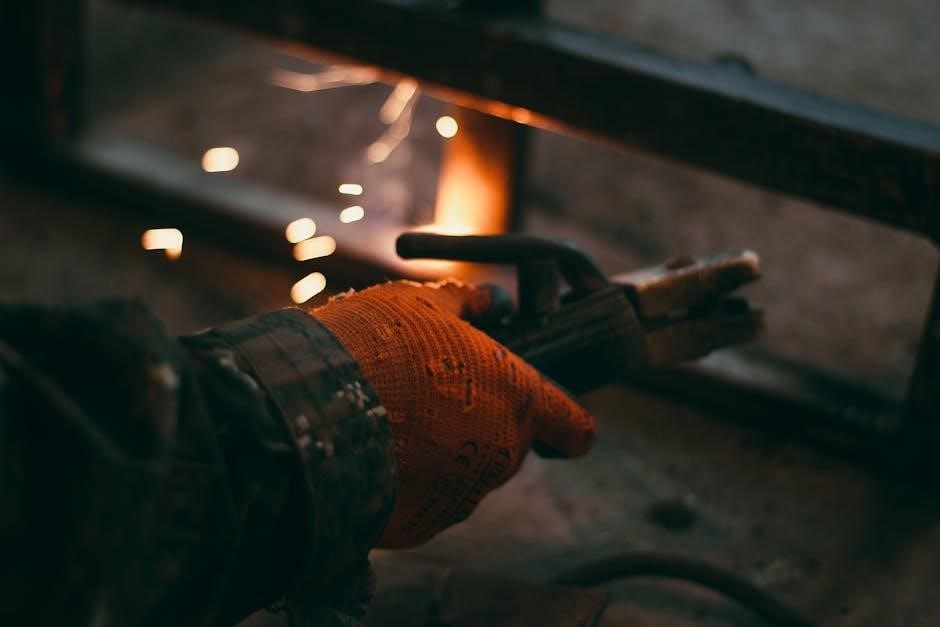
Always work in a well-ventilated area, and wear appropriate protective gear, including gloves and eye protection. Avoid skin and eye contact with the adhesive components.
Ventilation and Protective Gear
Working with epoxy adhesives like JB Weld Plastic Bonder necessitates prioritizing safety, and adequate ventilation is paramount. The fumes released during mixing and curing can be irritating to the respiratory system. Ensure you are operating in an open, well-ventilated space, or utilize a respirator specifically designed for organic vapors to minimize inhalation exposure.
Beyond ventilation, personal protective equipment (PPE) is crucial. Always wear chemical-resistant gloves – nitrile gloves are an excellent choice – to prevent skin contact. The adhesive can cause irritation or allergic reactions in sensitive individuals. Eye protection is equally vital; safety glasses or goggles will shield your eyes from splashes or accidental contact.
Consider wearing long sleeves and pants to further minimize skin exposure. If you are particularly sensitive, a disposable apron or coveralls can provide an additional layer of protection. Keep a supply of clean water nearby for immediate rinsing in case of accidental contact. Remember, proactive safety measures are essential for a successful and healthy repair experience with JB Weld Plastic Bonder.
Skin and Eye Contact Procedures
Accidental contact with JB Weld Plastic Bonder requires immediate and appropriate action. If the adhesive comes into contact with your skin, do not attempt to wipe it off with a dry cloth, as this can spread the adhesive and worsen the irritation. Instead, immediately flush the affected area with copious amounts of soap and water for at least 15 minutes.
For stubborn adhesive residue, a mild solvent like mineral spirits may be used cautiously, following the solvent’s safety instructions. However, prioritize water and soap first. If eye contact occurs, this is a more serious situation requiring urgent attention. Immediately flush the eye with a gentle, steady stream of clean water for a minimum of 20 minutes, holding the eyelid open to ensure thorough rinsing.
Do not rub the eye. Seek immediate medical attention, even if the irritation seems minor. It’s always best to err on the side of caution when dealing with chemical exposure. Keep the product’s Safety Data Sheet (SDS) readily available for medical professionals. Prompt and thorough rinsing is key to minimizing potential damage from JB Weld Plastic Bonder.
Storage and Handling
Proper storage and handling of JB Weld Plastic Bonder are crucial for maintaining its effectiveness and ensuring safety. Store the adhesive in a cool, dry, and well-ventilated area, away from direct sunlight, heat sources, and incompatible materials like strong oxidizers. Ideal storage temperatures range between 60°F and 80°F (15°C and 27°C).
Keep the container tightly closed when not in use to prevent the adhesive from drying out or becoming contaminated. Avoid storing the product in areas where it could be exposed to moisture or extreme temperature fluctuations. When handling JB Weld Plastic Bonder, always wear appropriate protective gear, including gloves and eye protection, to prevent skin and eye contact.
Avoid prolonged or repeated exposure to the adhesive. Do not eat, drink, or smoke while using the product. Always wash hands thoroughly with soap and water after handling. Ensure the product is kept out of reach of children and pets. Following these guidelines will help preserve the adhesive’s quality and promote a safe working environment.
Disposal of Used Materials
Proper disposal of JB Weld Plastic Bonder and contaminated materials is essential for environmental responsibility and adherence to local regulations. Once the adhesive has fully cured, it can generally be disposed of as solid waste, however, always check with your local waste management authorities for specific guidelines. Do not dispose of uncured or partially cured adhesive down the drain or into waterways, as this can cause environmental damage.
Contaminated items, such as mixing sticks, application tools, and disposable gloves, should be treated as hazardous waste and disposed of accordingly. Place these items in a sealed container labeled appropriately. Avoid mixing used adhesive with other waste materials. Empty containers should also be disposed of responsibly, following local regulations for epoxy resin containers.
Refer to the Safety Data Sheet (SDS) for detailed disposal information specific to JB Weld Plastic Bonder. Always prioritize environmentally sound disposal practices to minimize the impact on the ecosystem and comply with all applicable laws and regulations. Responsible disposal ensures a safer environment for everyone.
Leave a Reply
You must be logged in to post a comment.