Mapei Grout Mixing Instructions: A Comprehensive Guide
Navigating Mapei grout demands precision; understanding ratios and techniques ensures optimal performance and longevity of your tile installation project.
Proper mixing is crucial‚ influencing strength‚ color consistency‚ and resistance to staining‚ ultimately defining the aesthetic and functional success.
Understanding Mapei Grout Types
Mapei offers a diverse range of grouts‚ each formulated for specific applications and performance characteristics. Recognizing these differences is paramount for successful tile installation. Kerapoxy and Kerapoxy CQ are epoxy grouts‚ renowned for their exceptional strength‚ chemical resistance‚ and minimal water absorption – ideal for demanding environments like kitchens‚ bathrooms‚ and industrial settings.
These epoxy systems require meticulous mixing‚ as deviations from the specified ratios can severely compromise their properties. Ultracolor Plus‚ conversely‚ is a cementitious grout‚ offering versatility and ease of use. It’s suitable for a wider array of applications‚ including interior and exterior walls‚ floors‚ and countertops.
Ultracolor Plus boasts vibrant‚ consistent color options and enhanced stain resistance‚ making it a popular choice for residential projects. Understanding whether you’re working with an epoxy or cementitious grout dictates the mixing process and ultimately‚ the final result.
Epoxy Grout (Kerapoxy & Kerapoxy CQ) ౼ Critical Mixing
Kerapoxy and Kerapoxy CQ demand unwavering adherence to the manufacturer’s specified mixing ratios. These two-part epoxy systems are incredibly sensitive; even slight variations can lead to improper curing‚ diminished strength‚ or undesirable discoloration. The packaging provides precise Part A to Part B proportions‚ and utilizing accurate weighing scales is non-negotiable.
Never estimate or rely on volumetric measurements for epoxy grouts. Thoroughly combine the two components‚ scraping the sides and bottom of the mixing container to ensure complete homogenization. Avoid introducing air during mixing‚ as this can weaken the grout and create surface imperfections.
Mapei designs these products for full unit use‚ emphasizing the importance of using the entire package to maintain the correct chemical balance. Smaller kits are available to minimize waste‚ but always respect the prescribed ratios.
Cementitious Grout (Ultracolor Plus) ౼ Versatile Application
Ultracolor Plus offers flexibility in mixing‚ accommodating both weight-based and volume-based ratios‚ though weight is consistently more accurate. A common starting point is a 3:1 volume ratio of grout to water‚ but adjustments may be needed based on desired consistency and environmental conditions. Mapei recommends a 5:1 weight ratio for optimal results‚ providing superior control over the final product.
Gradually add the Ultracolor Plus powder to clean water‚ continuously stirring to prevent clumping. Avoid pouring water directly into the dry grout‚ as this can create a difficult-to-mix slurry. The goal is a smooth‚ homogenous texture free of lumps and air pockets.
Ultracolor Plus’s versatility extends to its 26 available colors‚ maintaining consistent shade throughout the mixing process is vital. Proper mixing ensures uniform color distribution‚ enhancing the aesthetic appeal of your tile installation.
Essential Tools & Materials
Success hinges on quality tools: rust-free containers‚ accurate scales for precise measurements‚ and low-speed mixing paddles are absolutely critical for optimal results.
Clean Mixing Containers – Rust-Free Requirement
Maintaining impeccable cleanliness is paramount when preparing Mapei grout. Always utilize containers fabricated from plastic or stainless steel; avoid any vessel exhibiting rust or corrosion. Rust particles introduce contaminants that can drastically alter the grout’s color‚ potentially causing unsightly discoloration and compromising its structural integrity.
Thoroughly wash and dry the mixing container before each use‚ eliminating any residual grout‚ dust‚ or other debris from previous applications. Even microscopic remnants can negatively impact the chemical reactions during mixing. A dedicated container solely for grout preparation is highly recommended to prevent cross-contamination.
The container’s size should be appropriate for the batch being mixed‚ allowing sufficient space for thorough blending without spillage. Remember‚ using a clean‚ rust-free container is a foundational step towards achieving a flawless and durable grout application.
Accurate Weighing Scales – Importance of Precision
Mapei grout formulations‚ particularly epoxy systems like Kerapoxy‚ demand unwavering accuracy in ingredient proportions. Relying on volumetric measurements (cups‚ spoons) is strongly discouraged‚ as variations in powder density and humidity can introduce significant errors. A calibrated digital weighing scale‚ capable of measuring in small increments (grams or ounces)‚ is absolutely essential.
Precision is not merely about achieving the correct ratio; it directly impacts the grout’s curing process‚ final strength‚ and color consistency. Even slight deviations can lead to incomplete hardening‚ reduced durability‚ or undesirable color shifts.
Tare the scale with the mixing container before adding ingredients to ensure accurate measurements. Double-check all weight readings before commencing the mixing process. Investing in a quality weighing scale is a small price to pay for a professional and long-lasting tile installation.
Mixing Paddles – Low-Speed Options
Selecting the appropriate mixing paddle is vital for achieving a homogenous Mapei grout mixture without introducing excessive air. High-speed drills can whip air into the grout‚ creating voids that weaken the final product and potentially cause discoloration. Opt for a low-speed mixing drill or a paddle specifically designed for grout and mortar.
Paddle shapes vary; a flat‚ rectangular paddle is generally effective for larger batches‚ while a spiral paddle can be beneficial for smaller quantities. Ensure the paddle reaches all areas of the mixing container‚ scraping the sides and bottom to incorporate all powder.
Maintain a consistent‚ slow mixing speed throughout the process. Avoid aggressive agitation. The goal is thorough blending‚ not aeration. A properly mixed grout will have a smooth‚ creamy texture.
Mixing Ratios: A Detailed Breakdown
Precise ratios are paramount for Mapei grouts; Kerapoxy demands strict Part A to Part B adherence‚ while Ultracolor Plus utilizes weight-based water-to-grout proportions.
Kerapoxy & Kerapoxy CQ – Strict Part A to Part B Ratio
Kerapoxy and Kerapoxy CQ epoxy grouts necessitate unwavering adherence to the manufacturer’s specified mixing ratios. These systems are meticulously formulated with precise proportions of Part A (resin) and Part B (hardener) to ensure proper chemical reaction and optimal performance characteristics. Deviating from these ratios‚ even slightly‚ can lead to significant issues.
Incorrect proportions may result in incomplete curing‚ leading to a soft‚ crumbly grout that lacks the desired strength and durability. Conversely‚ an excess of hardener can cause the grout to set up too rapidly‚ making application difficult and potentially compromising the bond. Discoloration and compromised strength are also potential consequences of improper mixing.
MAPEI packages Kerapoxy and Kerapoxy CQ in pre-measured units precisely to eliminate guesswork and ensure accurate ratios. Always use the entire unit – do not attempt to scale down or combine partial units. Thoroughly scrape the containers to ensure all components are incorporated into the mix. Maintaining this strict adherence is fundamental to achieving a successful and long-lasting epoxy grout installation.
Ultracolor Plus – Water to Grout Ratio (Weight Based)
For Ultracolor Plus cementitious grout‚ a weight-based water-to-grout ratio offers superior accuracy compared to volume-based measurements. MAPEI recommends adding 21-23% water by weight to the Ultracolor Plus powder. This means for every 100 parts of grout powder‚ you should add 21-23 parts of clean water‚ measured by weight‚ not volume.
Utilizing a precise weighing scale is paramount to achieving this accurate ratio. Start with the lower end of the range (21%) and incrementally add more water if needed to reach a smooth‚ consistent texture. Avoid adding excessive water‚ as this can weaken the grout and affect its color consistency.
This weight-based approach ensures optimal workability‚ adhesion‚ and durability. It minimizes the risk of under- or over-hydration‚ leading to a stronger‚ more reliable grout line. Always refer to the product data sheet for the most up-to-date recommendations and adjust based on ambient conditions.
Ultracolor Plus – Water to Grout Ratio (Volume Based ‒ 3:1 as a starting point)
While weight-based mixing is preferred‚ a volume-based ratio can serve as a convenient starting point for Ultracolor Plus grout. A commonly cited ratio is 3 parts grout powder to 1 part water by volume. However‚ it’s crucial to understand this is an approximation and may require adjustments.
Begin by adding approximately 80% of the estimated water volume to the grout powder in a clean container. Gradually add the remaining water while mixing‚ observing the consistency. The goal is a smooth‚ workable paste‚ free of lumps and air pockets.
Be prepared to fine-tune the water amount; environmental factors like temperature and humidity can influence the required water content. This volume ratio is less precise than weight-based mixing‚ so careful observation and adjustment are essential for optimal results.

Step-by-Step Mixing Instructions
Achieving flawless grout application hinges on a methodical mixing process; carefully follow these steps for consistent results and a durable‚ beautiful tile installation.
Step 1: Adding Grout to Water (Ultracolor Plus)

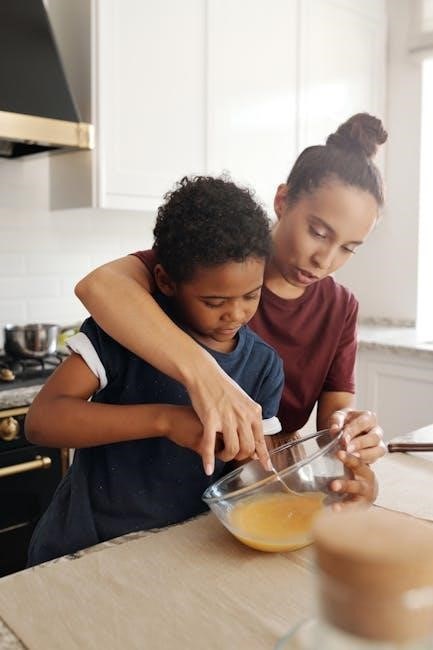
Initiating the mixing process for Mapei Ultracolor Plus grout requires a specific technique to ensure proper hydration and consistency. Begin by carefully pouring the clean‚ potable water into your rust-free mixing container. Crucially‚ then slowly add the Ultracolor Plus powder to the water‚ rather than the reverse.
This method prevents clumping and allows for more controlled hydration of the cementitious particles. The recommended water-to-grout ratio‚ by weight‚ typically falls between 21-23% – meaning for every 100 parts of grout‚ you’ll add 21-23 parts water. However‚ always refer to the specific product packaging for the most accurate ratio‚ as slight variations can occur.
Avoid overwhelming the water with too much powder at once; a gradual addition is key. This initial step sets the foundation for a smooth‚ workable grout mixture‚ minimizing the risk of lumps and ensuring optimal performance.
Step 2: Gradual Mixing – Avoiding Air Entrapment
Following the initial addition of Ultracolor Plus powder to water‚ the mixing phase demands a deliberate and controlled approach. Utilize a low-speed mixing paddle attached to a drill‚ or a hand mixing tool‚ to begin incorporating the powder into the water. Importantly‚ start slowly to prevent the creation of dust and minimize air entrapment within the mixture.
Gradually increase the mixing speed as the powder begins to hydrate‚ ensuring all areas of the container are reached. Avoid aggressive or high-speed mixing‚ as this introduces excessive air bubbles‚ weakening the final grout and potentially affecting color consistency.
Continuously scrape the sides and bottom of the container with the mixing paddle to fully incorporate any unmixed powder. This methodical process is vital for achieving a homogenous‚ lump-free grout mixture ready for application.
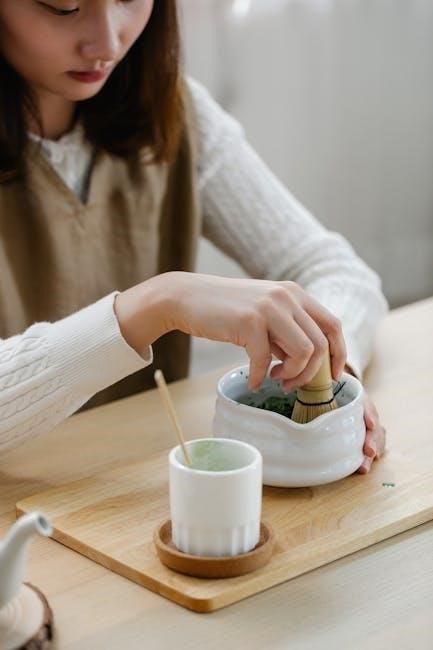
Step 3: Achieving Consistent Texture – Visual Inspection
After several minutes of gradual mixing‚ a critical visual inspection is necessary to confirm the grout’s consistency. The ideal texture for Mapei Ultracolor Plus grout resembles a smooth‚ creamy paste – similar to peanut butter or mayonnaise. It should exhibit a uniform color throughout‚ free from any dry pockets or lumps of unmixed powder.
Carefully examine the grout’s surface as it’s lifted with the mixing paddle; it should flow easily and leave a clean‚ even trail. If the mixture appears too stiff‚ incrementally add small amounts of clean water‚ remixing thoroughly after each addition. Conversely‚ if it’s too runny‚ cautiously add more grout powder.
Remember‚ achieving the correct consistency is paramount for optimal workability and a flawless final result. A properly mixed grout will fill joints completely and provide lasting durability.
Important Considerations During Mixing
Environmental factors and material quality significantly impact grout performance; water purity‚ temperature‚ and batch size require careful attention for successful outcomes.
Water Quality – Clean and Potable
Utilizing clean‚ potable water is paramount when mixing Mapei grouts‚ directly influencing the final product’s strength‚ color consistency‚ and overall performance. Impurities present in non-potable water sources – such as well water or water containing minerals – can initiate unwanted chemical reactions with the grout components.
These reactions may lead to compromised bonding‚ discoloration‚ or even prevent proper curing. Always verify that the water used meets local drinking water standards‚ ensuring it is free from excessive salts‚ oils‚ or organic matter. Distilled or deionized water is an excellent alternative‚ particularly in areas with questionable water quality.
Avoid using water that has been previously used for other purposes‚ as it may contain contaminants. Maintaining water purity safeguards the integrity of the Mapei grout‚ guaranteeing a durable and aesthetically pleasing tile installation.
Temperature Effects – Impact on Setting Time
Ambient temperature significantly influences the setting time of Mapei grouts‚ demanding careful consideration during installation‚ especially in fluctuating environments. Warmer temperatures generally accelerate the hydration process‚ leading to a faster set‚ while cooler temperatures retard it‚ extending the working time.
Extremely high temperatures can cause rapid skinning on the grout surface‚ hindering proper consolidation and potentially weakening the joint. Conversely‚ low temperatures may delay the initial set‚ increasing the risk of disturbance or damage.
Maintain a consistent temperature between 68°F (20°C) and 77°F (25°C) for optimal results; Adjust water temperature slightly to compensate for extreme conditions‚ but avoid adding ice directly to the mix. Monitoring and controlling temperature ensures predictable setting times and a robust‚ long-lasting tile installation.
Batch Size – Working with Manageable Quantities
Mixing grout in appropriately sized batches is paramount for consistent quality and efficient application. Avoid preparing excessively large quantities‚ as the working time is limited‚ and the grout can begin to set before complete installation. Smaller batches ensure the grout remains workable and maintain its optimal properties throughout the process.
Estimate the required grout volume based on the tile size‚ joint width‚ and area to be covered. Start with a manageable amount‚ typically enough for 15-20 square feet‚ and mix additional batches as needed. This approach minimizes waste and guarantees a uniform finish.
Always thoroughly mix each batch to ensure proper hydration and consistency. Avoid combining partially used batches with fresh grout‚ as this can lead to variations in color and performance. Careful batch control contributes to a professional and durable tile installation.

Application & Curing
Apply Mapei grout thoroughly‚ ensuring complete joint filling for optimal performance and aesthetics; allow a minimum of 24 hours for proper curing and cleaning.
Applying the Grout – Filling the Joints Completely
Begin applying the mixed Mapei grout diagonally across the tiled surface‚ using a rubber grout float to force the material into all joint spaces. Ensure complete and consistent filling‚ paying particular attention to corners and edges where voids can easily occur. Work in manageable sections‚ avoiding excessive spreading that can pull grout from the joints.
Maintain firm‚ even pressure with the float‚ removing excess grout as you progress. Multiple passes may be necessary to fully pack the joints‚ especially with wider grout lines or textured tiles. Regularly clean the float to prevent build-up and maintain a smooth application. After initial application‚ allow a slight dwell time – typically 15-30 minutes – to allow the grout to begin setting before proceeding to the cleaning stage;
Properly filled joints are essential for waterproofing and preventing future staining‚ so meticulous application is paramount for a durable and aesthetically pleasing result.
Grout Curing Time – Minimum 24 Hours
Allowing adequate curing time is paramount for achieving the full strength and durability of your Mapei grout installation. A minimum of 24 hours is generally recommended before subjecting the grouted surface to regular cleaning or light foot traffic. This period allows the cementitious or epoxy compounds to fully hydrate and develop their bonding properties.
Avoid excessive moisture exposure during the initial curing phase‚ as this can weaken the grout matrix. While some moisture is beneficial‚ prolonged saturation should be avoided. Depending on environmental conditions – temperature and humidity – a longer curing period of up to 72 hours may be advisable for optimal results.
Full curing ensures resistance to staining‚ cracking‚ and water penetration‚ safeguarding your tile investment for years to come. Resist the urge to rush this crucial step for a long-lasting‚ beautiful finish.
Cleaning Procedures – After Curing
Post-curing cleaning should be gentle to avoid damaging the newly hardened grout. Begin by removing any residual haze with a clean‚ damp sponge‚ rinsing frequently in clean water. Avoid abrasive cleaners or scouring pads‚ as these can scratch or discolor the grout lines. For stubborn haze‚ Mapei offers specific grout cleaning solutions designed to safely remove residue without compromising the grout’s integrity.
Regular maintenance involves sweeping or vacuuming to remove loose dirt and debris‚ followed by occasional damp mopping with a pH-neutral cleaner. Avoid harsh chemicals‚ acidic cleaners‚ or bleach-based products‚ as they can degrade the grout over time.
Promptly address spills to prevent staining. With proper cleaning and maintenance‚ your Mapei grout will maintain its beauty and performance for years to come.

Troubleshooting Common Mixing Issues
Addressing mixing errors is vital; incorrect ratios or contamination can lead to setting failures‚ discoloration‚ or weakened grout‚ impacting tile longevity and aesthetics;
Grout Not Setting – Potential Ratio Errors
A failure of Mapei grout to set properly is frequently linked to inaccurate mixing ratios‚ particularly critical with epoxy grouts like Kerapoxy and Kerapoxy CQ. These systems require precise proportions of Part A and Part B; deviations can inhibit the curing process entirely.
Insufficient Part B (hardener) is a common culprit‚ resulting in a perpetually soft or tacky grout. Conversely‚ excessive hardener can accelerate the reaction‚ leading to flash setting and rendering the grout unusable.
For cementitious grouts like Ultracolor Plus‚ improper water-to-grout ratios can also cause setting issues. Too much water weakens the bond and extends setting time indefinitely‚ while too little hinders hydration. Always adhere to the manufacturer’s recommended ratios‚ weighing ingredients for maximum accuracy‚ and thoroughly mixing to ensure complete component interaction.
Discoloration – Improper Mixing or Contamination
Uneven grout color often signals inadequate mixing‚ preventing uniform distribution of pigments within the Mapei product; Streaking or blotchiness can occur when dry powder remains unhydrated due to insufficient mixing time or improper technique.
Contamination is another significant cause of discoloration; introducing foreign substances like dirty water‚ cleaning agents‚ or even residue in mixing containers can alter the grout’s chemical composition and affect its final hue.
Epoxy grouts are particularly susceptible‚ as any contaminant can disrupt the resin-hardener reaction. Always use clean‚ rust-free containers and potable water. Ensure thorough mixing‚ scraping the sides and bottom to incorporate all powder‚ and avoid introducing any external materials during the process to maintain consistent color.
Weak Grout – Insufficient Mixing or Incorrect Proportions
Compromised grout strength frequently stems from inadequate mixing‚ failing to fully hydrate the cementitious particles or properly combine epoxy components. This results in a fragile matrix susceptible to cracking and crumbling under stress.
Incorrect proportions are equally detrimental; deviating from Mapei’s recommended ratios – especially critical with Kerapoxy – disrupts the chemical balance‚ leading to a weakened bond and reduced durability.
Insufficient mixing prevents complete reaction‚ while excess water in cementitious grouts dilutes the binding agents. Always prioritize precise measurement using accurate scales and thorough mixing with a low-speed paddle‚ ensuring a homogenous consistency for optimal performance and longevity.

Safety Precautions
Always wear protective gloves and eye protection during mixing to prevent skin and eye irritation. Ensure adequate ventilation to avoid inhaling dust or fumes.
Protective Gear – Gloves and Eye Protection
Prioritizing personal safety is paramount when handling Mapei grouts‚ particularly epoxy-based formulations. Direct skin contact can lead to irritation‚ dermatitis‚ or even allergic reactions in sensitive individuals. Therefore‚ wearing chemical-resistant gloves – such as nitrile or neoprene – is absolutely essential throughout the entire mixing and application process.
Eye protection is equally critical. Grout mixing can generate dust particles or splashes of liquid that pose a significant risk to your vision. Safety glasses with side shields‚ or preferably‚ chemical splash goggles‚ should be worn at all times to prevent any accidental exposure.
Consider a dust mask‚ especially when working with cementitious grouts‚ to minimize inhalation of fine particles. Proper protective gear not only safeguards your health but also contributes to a more comfortable and efficient working experience.
Ventilation – Ensuring Adequate Airflow
Maintaining proper ventilation is crucial during Mapei grout mixing and application‚ especially when utilizing epoxy-based products like Kerapoxy. These materials can release volatile organic compounds (VOCs) that‚ while generally low in concentration‚ can cause respiratory irritation or discomfort in poorly ventilated spaces.
Work in a well-ventilated area‚ ideally with open windows and doors to facilitate natural airflow. Consider using a fan to actively circulate the air and exhaust any fumes. If working indoors with limited ventilation‚ a respirator with an organic vapor cartridge may be necessary‚ particularly during prolonged exposure.
Adequate ventilation not only protects your respiratory health but also contributes to a more pleasant working environment‚ minimizing odors and ensuring optimal curing conditions for the grout.
Leave a Reply
You must be logged in to post a comment.