
Craftsman 1/2 HP Garage Door Opener User Manual: A Comprehensive Guide
This manual provides essential guidance for Craftsman 1/2 HP garage door openers, covering installation, operation, maintenance, and warranty details.
It specifically addresses models like 53479 and 139.5364812, offering a 90-day full warranty and a limited warranty extending to one year.
Welcome to the world of convenient and secure garage door operation! This Craftsman 1/2 HP garage door opener is designed for residential use, offering reliable performance and enhanced safety features. This opener, encompassing models like 53479 and 139.53915SRT, provides a powerful yet efficient solution for automating your garage door.
This user manual serves as a comprehensive guide, walking you through every step – from initial installation and wiring to daily operation and routine maintenance. Understanding the features and safety precautions outlined herein will ensure optimal performance and longevity of your opener. We’ll cover everything from identifying your door type to programming remote controls and troubleshooting common issues. Remember to retain this manual for future reference and warranty claims.
Model Numbers Covered
This user manual is applicable to a range of Craftsman 1/2 HP garage door opener models, ensuring broad compatibility and consistent guidance. Key models explicitly covered include 53479, designed for residential applications, and the more recent 139.5364812, offering updated features and performance;
Furthermore, this manual also provides relevant information for owners of the 139.53915SRT model, as well as its variant, the 139.53927SRT- 1/2 HP. While slight variations may exist between specific sub-models, the core principles of installation, operation, and maintenance remain consistent across the entire 1/2 HP Craftsman line. Always refer to the specific diagrams and instructions pertaining to your exact model number when performing any adjustments or repairs. Checking your model number is crucial for accessing the correct support resources.
Safety Precautions
Prioritizing safety is paramount when installing and operating your Craftsman 1/2 HP garage door opener. Always disconnect the power supply before performing any maintenance or repairs to prevent electrical shock. Never allow children to play near the garage door or operate the opener.

Regularly test the safety reversing system to ensure it functions correctly, preventing the door from closing on obstructions. Be mindful of potential pinch points during operation. Inspect the garage door tracks for obstructions and ensure they are free of debris.
Properly adjust door travel limits to avoid excessive force or strain on the opener; Never attempt to bypass or disable safety features. If you are unsure about any aspect of installation or operation, consult a qualified technician. Ignoring these precautions could result in serious injury or damage.
Installation Process
Proper installation is crucial for optimal performance. This involves identifying your garage door type, preparing the door itself, securely mounting the opener unit, and carefully connecting the door arm.
Identifying Garage Door Type and Height
Before beginning installation, accurately determine your garage door’s type and height. This is a foundational step for ensuring compatibility and proper operation of your Craftsman 1/2 HP opener. Common door types include one-piece and sectional doors, each requiring slightly different mounting procedures.
To measure the height, close the door and measure from the floor to the highest point of the door’s track. This measurement is vital for adjusting the door travel limits later in the installation process.
Inspect where the door meets the floor; any gaps or unevenness should be noted as they may require adjustments. Refer to the manual for specific instructions related to your door type. Correct identification prevents installation errors and ensures the safety reversing system functions correctly.
Remember to consult page 16 of the manual for detailed guidance on this crucial initial assessment.
Preparing the Garage Door
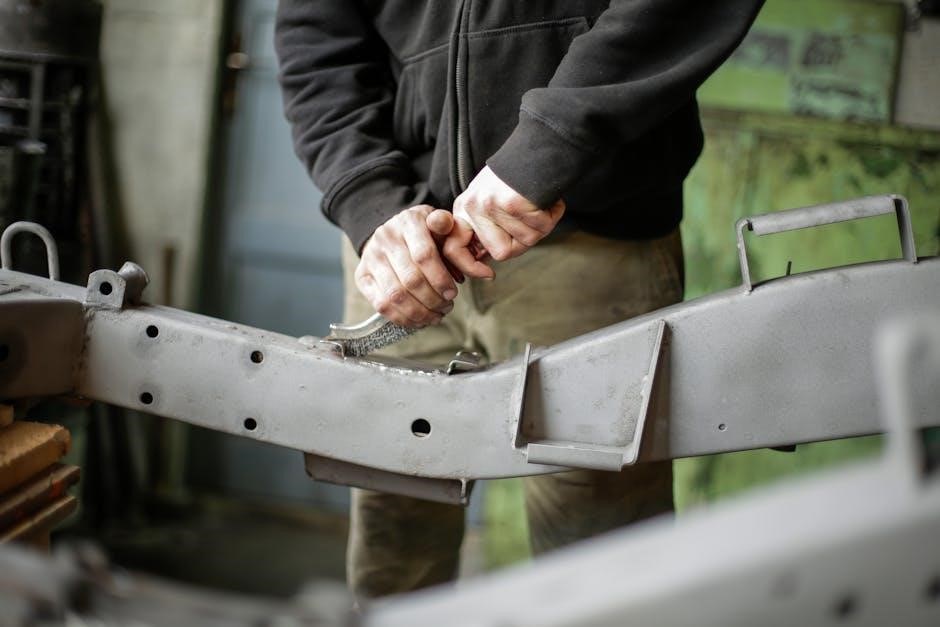
Prior to mounting the opener, thorough garage door preparation is essential for a smooth installation. Begin by ensuring the door operates smoothly and is properly balanced – a poorly balanced door can cause significant damage to the opener. Manually operate the door through a full cycle, observing for any binding or resistance.
Inspect the door’s rollers, hinges, and tracks. Lubricate any stiff or noisy components to ensure free movement. Check for any obstructions or debris within the tracks that could impede the door’s travel.

Address any existing issues, such as loose hardware or damaged sections, before proceeding. A release may be required to disconnect the door for certain adjustments.
Carefully examine the foam padding along the bottom of the door, as parts may become stuck within it. Proper preparation minimizes strain on the opener and maximizes its lifespan.
Mounting the Opener Unit
Securely mounting the opener unit is crucial for stable and reliable operation. Begin by identifying suitable mounting locations within your garage, ensuring adequate headroom and accessibility for adjustments. Utilize sturdy mounting hardware appropriate for your garage’s ceiling construction – wood or steel.
Carefully position the opener unit, aligning it with the center of the garage door. Use the provided mounting brackets to securely attach the unit to the ceiling joists or steel supports. Double-check that all connections are tight and stable, preventing any potential vibrations or movement during operation.
Ensure sufficient clearance around the unit for maintenance and adjustments.
Proper mounting minimizes noise and extends the lifespan of the opener. A stable installation is fundamental for the entire system’s performance and safety.
Connecting the Door Arm to the Trolley
Properly connecting the door arm to the trolley is essential for smooth and efficient garage door operation. This step translates the opener’s power into door movement. Begin by extending the door arm to roughly align with the trolley.
Securely attach the door arm to the trolley using the provided hardware – typically a pin and clip. Ensure the connection is firm and doesn’t exhibit any looseness. For one-piece doors, specific instructions apply, requiring careful alignment and secure fastening.
Verify the arm’s length is appropriate for your door’s height and travel. Incorrect length can hinder operation or cause excessive strain on the system.
A correctly connected arm ensures the door lifts and lowers evenly, maximizing the opener’s performance and preventing potential damage.
Adjusting Door Travel Limits
Precisely adjusting the door travel limits is crucial for safe and reliable operation. These limits define how far the door opens and closes, preventing over-travel and potential damage. Locate the adjustment screws on the opener unit – typically marked “Up” and “Down”.
Begin by setting the “Down” limit, ensuring the door closes completely without straining the opener. Then, adjust the “Up” limit, stopping the door at the desired open height. Small, incremental adjustments are recommended for accuracy.
Test the limits thoroughly after each adjustment, observing the door’s movement and listening for any unusual noises. Properly set limits prevent the door from hitting obstructions or exceeding its operational range.
Refer to the manual’s diagrams for specific screw locations and adjustment procedures for your model.

Wiring and Electrical Connections
Safe and correct electrical connections are paramount. This section details power supply requirements, wiring safety sensors, and connecting the wall control for optimal functionality.
Power Supply Requirements

Ensuring a stable and appropriate power supply is crucial for the safe and reliable operation of your Craftsman 1/2 HP garage door opener. This opener typically requires a standard 120-volt, 60Hz electrical service. It is absolutely essential to verify that the circuit serving the opener has a dedicated 15- or 20-amp breaker to prevent overloading and potential hazards.
Do not connect the opener to an extension cord, as this can reduce voltage and cause overheating. The electrical outlet should be readily accessible, but not located directly above or near the opener to avoid water damage. Always disconnect power at the breaker before performing any wiring or maintenance. Grounding is also vital; ensure the outlet is properly grounded according to local electrical codes. Improper wiring can lead to malfunction, fire, or electrical shock.
Wiring the Safety Sensors
Properly wiring the safety sensors is paramount for preventing accidental garage door closure and ensuring the safety of people and objects below. These sensors, typically infrared beams positioned near the garage door opening, must be connected to the designated terminals on the opener unit. Ensure the wires are securely connected and free from damage.
Typically, the sensors utilize a low-voltage wiring system. Connect the sensor wires to the terminals labeled “Safety Sensors” or similar on the opener’s control board. Verify the wiring diagram in your specific model’s manual. If the sensors are misaligned or the wiring is faulty, the door will not close. Test the sensors frequently by interrupting the beam while the door is closing; it should immediately reverse. Correct any wiring issues immediately for safe operation.
Connecting the Wall Control
The wall control provides a convenient, hardwired method for operating your Craftsman garage door opener. Connecting it involves attaching low-voltage wires to the designated terminals on the opener unit’s control board. Locate the terminals clearly labeled for the wall control – typically, they’ll be color-coded or marked with symbols.
Ensure a secure connection of the wires to prevent intermittent operation. The wall control usually features three buttons: Up, Down, and Stop. Verify the wiring diagram specific to your model number for accurate connections. After wiring, test the wall control’s functionality by pressing each button to confirm the door responds correctly. If the control doesn’t work, double-check the wiring and consult the troubleshooting section of this manual.
Operation and Features
This section details how to effectively use your Craftsman opener, including wall control operation, remote programming, and understanding the safety reversing system for secure use.
Using the Wall Control
The wall control serves as a primary method for operating your Craftsman 1/2 HP garage door opener. Typically, a single press of the “Open” button initiates the door’s upward movement, while a subsequent press of the “Close” button brings the door down.
Pay close attention to the indicator lights; they provide valuable feedback on the opener’s status. A flashing light may indicate a safety sensor issue or a programming need.
Ensure a clear line of sight between the wall control and the opener unit for reliable communication.
If the door doesn’t respond, verify the power supply and check for any obstructions.
Remember that the wall control overrides any remote commands, providing a direct and dependable control option. Always supervise the door’s operation when using the wall control, especially during initial setup or troubleshooting.
Remote Control Programming
Programming your Craftsman remote control establishes a secure connection with your 1/2 HP garage door opener. Begin by locating the “Learn” or “Program” button on the opener unit – it’s usually yellow or orange.
Press and release this button; you’ll typically have a limited timeframe (around 30 seconds) to complete the next step.
Within that timeframe, press and hold the desired button on your remote control until the opener’s light flashes, indicating successful programming.
Repeat this process for each additional remote control you wish to pair with the system.
If programming fails, ensure the remote has fresh batteries and repeat the steps. Refer to the specific model’s instructions for any unique programming sequences. Always test the remote’s functionality after programming to confirm proper operation.
Understanding the Safety Reversing System
The safety reversing system is a crucial feature of your Craftsman 1/2 HP garage door opener, designed to prevent injuries and damage. This system utilizes safety sensors, typically located near the floor on either side of the garage door opening.
These sensors emit an invisible beam; if this beam is interrupted by an obstruction – like a person, pet, or object – while the door is closing, the opener will automatically reverse the door’s direction.
This prevents the door from fully closing on the obstruction. Proper alignment and functionality of these sensors are paramount for safe operation.
Regular testing is essential to ensure the system is working correctly. A misaligned or dirty sensor can compromise the safety feature, so keep them clean and properly positioned.

Testing the Safety Reversing Sensor
Regularly testing the safety reversing system is vital for ensuring the continued safe operation of your Craftsman 1/2 HP garage door opener. To perform a test, position a tall object – like a 2×4 piece of wood – horizontally across the door’s path, but not directly under the door when it’s fully closed.
Activate the garage door opener and observe its behavior. As the door descends and encounters the obstruction, it should immediately stop and reverse direction, moving back to the open position.
If the door does not reverse, immediately disconnect the power to the opener and investigate the issue.
Check the sensor alignment, clean the sensor lenses, and consult the troubleshooting section of this manual. Do not use the opener until the safety reversing system is functioning correctly. This test confirms the system’s responsiveness and protects against potential hazards.
Operation Safety Instructions
Always keep children and pets away from the garage door during operation. Never allow them to play near the door or with the remote controls. Supervise children closely when teaching them about the garage door opener’s functions.
Never run the garage door while anyone is underneath it. The safety reversing system is a crucial feature, but it shouldn’t be relied upon as a substitute for caution.
Regularly inspect the garage door for any signs of damage or imbalance. A damaged door can pose a safety risk. Do not attempt to repair the door yourself if you are not qualified.
Ensure the safety sensors are properly aligned and free from obstructions. Never disable or bypass the safety features of the opener. Prioritize safety at all times when operating your Craftsman garage door opener.

Maintenance and Troubleshooting
Regular care, lubrication, and prompt attention to issues ensure optimal performance and longevity of your Craftsman 1/2 HP opener.
Check for stuck parts and understand the release mechanism.
Care of Your Opener
Maintaining your Craftsman 1/2 HP garage door opener is crucial for reliable operation and extending its lifespan. Regularly inspect the entire system for any signs of wear, damage, or loose components. Pay close attention to the door tracks, rollers, and hinges, ensuring they are clean and properly lubricated. A visual inspection should also include the opener unit itself, checking for any unusual noises or vibrations during operation.
Periodically wipe down the exterior of the opener unit with a damp cloth to remove dust and debris. Avoid using harsh chemicals or abrasive cleaners, as these can damage the finish. Furthermore, ensure the safety sensors are clean and unobstructed to guarantee the safety reversing system functions correctly. Consistent preventative maintenance will minimize the need for costly repairs and ensure years of trouble-free operation. Remember to disconnect power before performing any maintenance tasks.
Lubrication Guidelines
Proper lubrication is vital for the smooth and quiet operation of your Craftsman 1/2 HP garage door opener. Regularly lubricate the door’s moving parts, including the rollers, hinges, and tracks, using a silicone-based lubricant or white lithium grease. Avoid using oil-based lubricants, as they can attract dirt and grime, leading to increased wear and tear.
Apply the lubricant sparingly to each component, wiping away any excess. The chain or belt drive system of the opener itself may also require occasional lubrication, depending on the model; consult the specific instructions for your unit. Check for stuck parts during lubrication, addressing any resistance immediately. Ensure the lubricant doesn’t interfere with the safety sensors. Consistent lubrication reduces friction, minimizes noise, and extends the life of your garage door and opener system.
Troubleshooting Common Issues
Encountering problems with your Craftsman 1/2 HP opener? A common issue is the door reversing unexpectedly – verify the safety reversing system is functioning correctly and the sensors are aligned. If the opener doesn’t respond, check the power supply and wiring connections. A clicking sound might indicate a problem with the capacitor or motor. Checking for stuck parts within the tracks is crucial; obstructions can prevent smooth operation.
If the remote isn’t working, reprogram it following the instructions in the manual. Ensure the wall control has fresh batteries. For more complex issues, consult the detailed troubleshooting section of your owner’s manual or contact a qualified technician. Remember to disconnect power before attempting any repairs. Prioritize safety and refer to the warranty information for potential coverage.
Checking for Stuck Parts
Regularly inspecting for obstructions is vital for smooth garage door operation. Begin by visually examining the tracks for any debris, such as leaves, dirt, or tools. Pay close attention to the areas where the door meets the floor, as parts can become lodged in the foam weather stripping. Parts may be stuck within the tracks, hindering movement.
Manually operate the door (with the opener disengaged) to identify any points of resistance. Lubricate the rollers and hinges to reduce friction. Inspect the springs for signs of damage or tension loss – do not attempt to repair springs yourself. Ensure the door arm is securely connected to the trolley. A thorough check can prevent more significant issues and extend the life of your Craftsman opener.
Release Mechanism Operation
The release mechanism allows manual operation of the garage door during power outages or maintenance. Locate the emergency release cord, typically hanging from the trolley. Release is required to disconnect the opener and operate the door by hand. Gently pull the cord downwards until the door is free from the carriage.
Exercise caution as the door may move quickly. Once disconnected, you can lift or lower the door manually. To re-engage the opener, simply pull the release cord upwards until it clicks back into place. Ensure the door is fully seated before attempting to operate it with the opener. Always test the safety reversing system after re-engagement to confirm proper functionality.

Warranty Information
Craftsman provides a 90-day full warranty covering defects in material or workmanship. A limited warranty extends from day 91 to one year, covering replacement parts only.
Full 90-Day Warranty Details
For a period of 90 days from the original purchase date, Sears will diligently repair any defect found in the material or workmanship of your Craftsman 1/2 HP garage door opener at absolutely no charge to you. This comprehensive coverage ensures peace of mind during the initial operational phase of your opener.
This full warranty encompasses all necessary repairs, including parts and labor, performed by authorized service technicians. To initiate a warranty claim within this 90-day window, simply contact Sears customer service with your proof of purchase. Sears reserves the right to inspect the defective part or opener to validate the warranty claim. This warranty is exclusively for residential use and does not cover damage resulting from misuse, abuse, or improper installation.
Limited Warranty (91 Days ⎼ 1 Year)
Extending beyond the initial 90-day full warranty, a limited warranty applies from the 91st day up to one full year from the date of your original purchase. During this period, Sears will furnish replacement parts, free of charge, for any defective components within your Craftsman 1/2 HP garage door opener.
However, it’s important to note that this limited warranty does not cover the cost of labor associated with replacing these parts. You will be responsible for all labor charges incurred during the repair process. To utilize this limited warranty, contact Sears customer service and provide proof of purchase. This warranty remains valid only for residential use and excludes damage caused by improper installation, misuse, or acts of nature.
Motor Specific Warranty
Craftsman 1/2 HP garage door openers benefit from a dedicated warranty specifically covering the motor itself. This warranty provides additional peace of mind, recognizing the motor as a critical component of the entire system. Details regarding the motor’s warranty duration and coverage may vary depending on the specific model number of your opener.
Generally, the motor warranty extends beyond the standard limited warranty, offering protection against defects in materials or workmanship. To understand the precise terms and conditions applicable to your motor, refer to the warranty documentation included with your purchase or contact Sears customer support. Proper maintenance, as outlined in this manual, is crucial for maintaining motor performance and warranty validity.
Leave a Reply
You must be logged in to post a comment.