
Brother Project Runway Sewing Machine: A Comprehensive Manual
This manual provides detailed guidance for users of the Brother Project Runway sewing machine series, covering setup, operation, maintenance, and troubleshooting.
It’s designed to enhance your creative journey,
inspired by the popular fashion competition!
The Brother Project Runway series represents a unique collaboration, bringing the excitement and innovation of the renowned fashion design competition directly into your home sewing space. These machines aren’t simply sewing tools; they are gateways to unleashing your creativity and exploring the world of fashion design, mirroring the challenges and triumphs seen on the television show.
Inspired by the Bravo reality series, Brother aimed to create machines that empower both novice and experienced sewists to tackle a wide range of projects, from simple alterations to complex garment construction. The series embodies the spirit of resourcefulness and quick thinking that defines the show, offering features designed for efficiency and precision.
Project Runway’s impact extends beyond entertainment, fostering a renewed interest in sewing and design. These machines capitalize on that momentum, providing users with the tools to translate their fashion visions into reality. They are built to handle diverse fabrics and techniques, encouraging experimentation and skill development. The series truly makes it “cool to hunker down behind a sewing machine!”
Understanding Your Machine’s Key Features
Brother Project Runway machines boast a range of features designed to streamline your sewing experience and elevate your project outcomes. Core functionalities include a selection of built-in stitches, catering to diverse techniques like straight stitching, zigzagging, and decorative embellishments. Many models offer automatic needle threading, simplifying a traditionally tedious task and saving valuable time.
Adjustable stitch length and width provide precise control over your seams, allowing for customization based on fabric type and desired aesthetic. A user-friendly interface, often featuring an LCD screen, facilitates easy stitch selection and setting adjustments. Furthermore, these machines typically include a speed control function, enabling you to sew at a comfortable pace, particularly beneficial for beginners.
Connectivity options, such as compatibility with Brother iPrint&Scan, expand functionality, allowing for wireless printing and scanning capabilities. The machines are engineered for reliability and durability, ensuring consistent performance throughout numerous projects. Genuine Brother supplies are recommended to maintain optimal machine function and longevity.
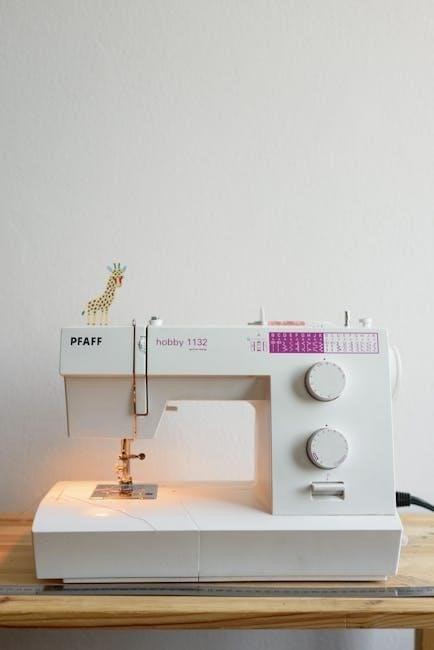
Machine Components and Their Functions
The Brother Project Runway sewing machine comprises several key components working in harmony. The power switch initiates operation, while the handwheel allows for manual stitch control. The bobbin winder prepares the bobbin for seamless stitching, and the bobbin case holds it securely. The needle, selected based on fabric type, pierces the material to create stitches.
The presser foot applies pressure to the fabric, ensuring even feeding. Different presser feet cater to specialized tasks like zipper insertion or buttonholes. The stitch plate guides the fabric under the needle, and the feed dogs move the fabric forward. The tension dial regulates thread tension for balanced stitches.
The thread take-up lever controls thread flow, and the spool pin holds the thread spool. The LCD screen (on applicable models) displays stitch selections and settings. Understanding each component’s role is crucial for efficient operation and maintenance. Regular cleaning and oiling, utilizing genuine Brother supplies, will prolong the machine’s lifespan and performance.
Setting Up Your Sewing Machine
Before embarking on your sewing projects, proper setup is essential. Begin by placing the Brother Project Runway machine on a stable, level surface with adequate lighting. Connect the power cord to a grounded outlet and switch the machine on. Ensure the handwheel turns freely. Next, attach the desired presser foot, aligning it correctly with the shank and securing it with the appropriate screw.
Install a new needle suitable for your fabric type, following the threading guide. Properly wind the bobbin with thread, ensuring even distribution. Insert the bobbin into the bobbin case, following the diagram in your machine’s manual. Raise the presser foot and thread the machine according to the illustrated threading path.
Adjust the thread tension dial to a neutral setting initially. Perform a test stitch on a scrap fabric to verify correct tension and stitch formation. Familiarize yourself with the machine’s controls and features before starting your project. A well-setup machine ensures smooth and enjoyable sewing.
Threading the Machine: A Step-by-Step Guide
Correct threading is crucial for optimal sewing performance. First, with the machine turned off and the presser foot raised, guide the thread from the spool pin, through the first thread guide, and around the tension discs. Ensure the thread seats firmly between the discs for proper tension control.
Next, continue threading through the take-up lever, then down and around the thread guide near the needle area. Finally, thread the needle from front to back (or as specified in your machine’s manual). Gently pull a few inches of thread through the needle eye.
Raise the needle to its highest position and draw up the bobbin thread by gently pulling on the needle thread. This creates a loop that you can pull through, bringing the bobbin thread to the top. Always refer to the detailed threading diagram printed on your machine for visual assistance. Proper threading prevents skipped stitches and ensures smooth operation.
Winding and Inserting the Bobbin
Preparing the bobbin is a fundamental step. Place the spool of thread on the spool pin and guide the thread through the bobbin winding tension disc. Then, wind several rotations around the bobbin core before starting the winding process. Engage the bobbin winding mechanism by pushing the bobbin winding spindle to the right.
Press the foot pedal gently to begin winding. The machine will automatically stop when the bobbin is full. Once wound, carefully remove the bobbin and trim the thread. To insert the bobbin, open the bobbin cover and place the bobbin into the bobbin case, ensuring it rotates in the correct direction (refer to your machine’s diagram).
Draw up the bobbin thread by holding the needle thread gently and turning the handwheel towards you. A loop will form, allowing you to pull the bobbin thread to the surface. Correct bobbin insertion and threading are vital for balanced stitches and preventing issues like thread bunching.
Basic Stitch Selection and Adjustment
Your Brother Project Runway machine offers a variety of built-in stitches, catering to diverse sewing needs. To select a stitch, locate the stitch selection dial – typically featuring a chart displaying available options. Rotate the dial to the desired stitch number or symbol. Common stitches include straight stitch, zigzag stitch, and various decorative options.

Understanding stitch purpose is key. Straight stitches are ideal for seams, while zigzag stitches are suitable for finishing raw edges or creating stretchable seams. Experiment with different stitches on scrap fabric to observe their effects. The machine’s control panel will often display a visual representation of the selected stitch.
Initial stitch settings are a starting point. Further refinement is achieved through adjusting stitch length and width, detailed in subsequent sections. Always test your chosen stitch on a fabric scrap before beginning your project to ensure optimal results and prevent errors.
Adjusting Stitch Length and Width
Precise control over stitch length and width is crucial for achieving professional-looking results. Your Brother Project Runway machine features dedicated dials or buttons for adjusting these parameters. Stitch length determines the distance between individual stitches; shorter lengths create denser, stronger seams, while longer lengths are suitable for basting or gathering.
Stitch width controls the breadth of zigzag or decorative stitches. A wider width creates a bolder effect, while a narrower width offers more subtle detailing. Always test adjustments on scrap fabric before applying them to your project. Observe how changes impact fabric appearance and seam strength.
Refer to your machine’s stitch chart for recommended settings for different fabrics and stitch types. Generally, woven fabrics require shorter stitch lengths than knit fabrics. Experimentation is encouraged, but always prioritize secure and aesthetically pleasing seams. Remember to re-evaluate settings with each fabric change.
Needle Selection for Different Fabrics
Choosing the correct needle is paramount for successful sewing and preventing fabric damage. Universal needles are versatile for woven fabrics, but specialized needles optimize performance with specific materials. Ballpoint needles, with rounded tips, are essential for knit fabrics, preventing skipped stitches and runs.
Denim needles, robust and strong, tackle heavy-weight fabrics like denim and canvas. Leather needles feature a wedge-shaped point to pierce leather cleanly. Metallic needles have a highly polished finish to avoid snagging delicate metallic or synthetic threads. Needle size corresponds to fabric weight; smaller numbers suit fine fabrics, while larger numbers handle heavier materials.
Always replace needles regularly, as they dull with use. A dull needle can cause skipped stitches, fabric puckering, and increased thread breakage. Consult your machine’s manual for recommended needle types and sizes for various fabrics. Proper needle selection ensures smooth operation and professional-quality results.
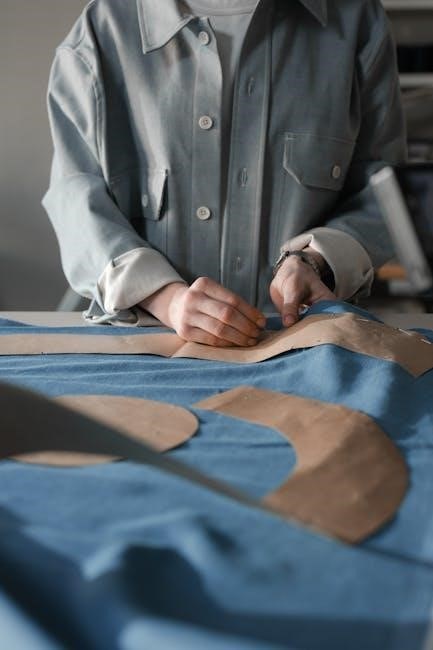
Presser Feet: Types and Uses
Your Brother Project Runway machine comes equipped with a variety of presser feet, each designed for specific sewing tasks. The standard zigzag foot is all-purpose, suitable for most fabrics and stitches. A narrow zigzag foot excels with delicate fabrics and precise zigzag applications.
The buttonhole foot automates buttonhole creation, ensuring consistent size and shape. A blind hem foot creates nearly invisible hems on skirts and trousers. The zipper foot allows close stitching along zipper teeth, preventing interference. A quilting foot facilitates even stitch distribution for quilting projects.
An open toe foot provides enhanced visibility for decorative stitches and appliqué. A walking foot assists in feeding multiple layers of fabric evenly, ideal for quilting and bulky materials. Correct presser foot selection dramatically improves stitch quality and sewing efficiency. Refer to your machine’s manual for detailed instructions on attaching and using each foot.
Free Motion Quilting with Your Machine
Unleash your creativity with free motion quilting! This technique allows you to draw designs on your fabric while sewing, creating unique textures and patterns. First, attach the free motion quilting foot (also known as a darning foot); Lower the feed dogs – this disengages the machine’s automatic fabric feeding.
Set your stitch length to zero. Gently move the fabric under the needle, guiding it with both hands. The speed of your sewing will determine the stitch density. Practice on scrap fabric to get a feel for the movement. Consistent hand pressure is key to achieving smooth lines.
Experiment with different thread colors and weights to add depth and dimension. Free motion quilting is perfect for creating custom quilt designs, embellishing garments, and adding personalized touches to your projects. Remember to maintain a relaxed grip and let the machine do the work!
Troubleshooting Common Sewing Problems
Encountering issues? Don’t worry, many sewing problems are easily resolved! Thread bunching often indicates incorrect threading or improper tension. Re-thread the machine, ensuring the thread is seated correctly in all guides and the tension dial is appropriately set for your fabric.
Skipped stitches can be caused by a dull or incorrect needle. Replace the needle with a new one suitable for your fabric type. Fabric puckering suggests the tension is too tight; loosen the upper tension dial slightly. If the needle breaks, stop immediately and check for obstructions.
Consistent errors may indicate a need for cleaning and oiling (see maintenance section). Always unplug the machine before performing any maintenance. Refer to the machine’s diagrams for correct component placement during reassembly. If problems persist, consult Brother’s support resources for further assistance.
Maintaining Your Sewing Machine
Regular maintenance is crucial for optimal performance and longevity of your Brother Project Runway machine. Dust and lint buildup can hinder operation, so frequent cleaning is essential. Always unplug the machine before any maintenance. Use a soft brush to remove lint from the bobbin area, feed dogs, and around the needle plate.
Oiling lubricates moving parts, ensuring smooth operation. Apply a few drops of sewing machine oil to designated oiling points (refer to your machine’s diagram). Avoid over-oiling, as excess oil can attract dust. Periodically inspect the needle and replace it when dull or damaged.
Proper storage also contributes to machine health. Cover the machine when not in use to protect it from dust. Following these simple steps will keep your Brother machine running smoothly for years of creative projects!
Cleaning and Oiling Procedures
Consistent cleaning prevents lint and dust accumulation, vital for smooth sewing. Always disconnect the power cord before starting. Use the brush accessory to gently remove lint from the bobbin case, feed dogs, and needle plate area. A vacuum cleaner with a brush attachment can also be helpful, but use low suction.
Oiling ensures moving parts function correctly. Apply sewing machine oil (never household oil!) to oiling points indicated in your machine’s manual – typically around the bobbin winder, hook assembly, and presser bar. A single drop per point is sufficient; avoid over-oiling.
Wipe away any excess oil with a clean, soft cloth. Regular cleaning (after each project) and oiling (every few months, or as needed) will significantly extend your Brother Project Runway machine’s lifespan and maintain its performance.
Replacing the Needle
A dull or damaged needle can cause skipped stitches, fabric puckering, and even machine damage. Regularly inspect your needle for bends, burrs, or a blunt tip. Always disconnect the power before changing the needle!
Loosen the needle clamp screw using the screwdriver included with your machine. Gently pull the old needle upwards. Insert the new needle with the flat side facing the back of the machine. Ensure the needle is fully inserted into the needle clamp.
Tighten the needle clamp screw securely, but avoid over-tightening. Use only Brother-approved needles designed for your machine model. Different fabrics require different needle types (universal, ballpoint, stretch, etc.). Refer to your machine’s manual for guidance on needle selection. A properly installed needle is crucial for optimal sewing performance and fabric quality.
Connecting to Brother iPrint&Scan
Brother iPrint&Scan is a versatile mobile app allowing you to print and scan directly from your smartphone or tablet to your Brother sewing machine (if equipped with wireless capabilities). Download the app from the App Store (iOS) or Google Play Store (Android).
Ensure your sewing machine is connected to the same Wi-Fi network as your mobile device. Open the iPrint&Scan app and follow the on-screen instructions to search for available Brother machines. A list of connected devices will appear.
Tap on your machine in the list to establish a connection. You may be prompted to enter a PIN or confirm the connection on your machine’s display. Once connected, you can utilize the app to manage machine settings, print designs, and scan patterns. Refer to the Brother support website for detailed setup guides and troubleshooting tips.
Wireless Setup and Wi-Fi Connectivity
Establishing a wireless connection unlocks the full potential of your Brother Project Runway sewing machine, enabling features like mobile app control and direct pattern downloads. Begin by accessing the machine’s settings menu, typically navigated through the LCD screen and control panel buttons.
Locate the Wi-Fi setup option and select your network from the available list. You’ll be prompted to enter your Wi-Fi password using the on-screen keyboard. Ensure the password is entered correctly, as incorrect credentials will prevent connection.
Once connected, a Wi-Fi indicator will illuminate on the machine’s display. You can then utilize apps like Brother iPrint&Scan for enhanced functionality. Refer to the machine’s detailed manual or the Brother support website for specific instructions tailored to your model. Troubleshooting steps are available online if you encounter connection issues.
Genuine Brother Supplies: Drum Units and Toner Cartridges
To ensure optimal performance and longevity of your Brother Project Runway sewing machine – particularly models with integrated printing or scanning capabilities – Brother strongly recommends using only genuine Brother drum units and toner cartridges. These components are specifically engineered to work in harmony with your machine’s internal systems.
Using non-genuine supplies can lead to diminished print quality, potential machine malfunctions, and may even void your warranty. Genuine Brother supplies are designed to deliver consistent, reliable results, preserving the vibrant colors and sharp details of your printed patterns and designs.
Brother machines are calibrated to operate at precise temperatures, optimized for genuine Brother consumables. Always check the product packaging to confirm compatibility with your specific model. Purchasing genuine supplies protects your investment and guarantees a superior sewing and crafting experience.
Resources and Support for Brother Owners
Brother Canada provides comprehensive support for all Brother Project Runway sewing machine owners, ensuring a seamless and enjoyable creative experience. A wealth of self-serve resources are readily available online, including frequently asked questions, troubleshooting guides, and downloadable manuals.
For direct assistance, Brother offers a dedicated customer support team accessible via phone, email, and live chat. The Brother website features a robust support section where you can find answers to common queries and access helpful tutorials.
Furthermore, the Brother iPrint&Scan app – available for both Windows and Macintosh – simplifies machine management, printing, and scanning. Explore the official Brother website for the latest software updates, driver downloads, and accessory information. Embrace the vibrant Brother community for inspiration and shared knowledge, maximizing your sewing machine’s potential!
Leave a Reply
You must be logged in to post a comment.